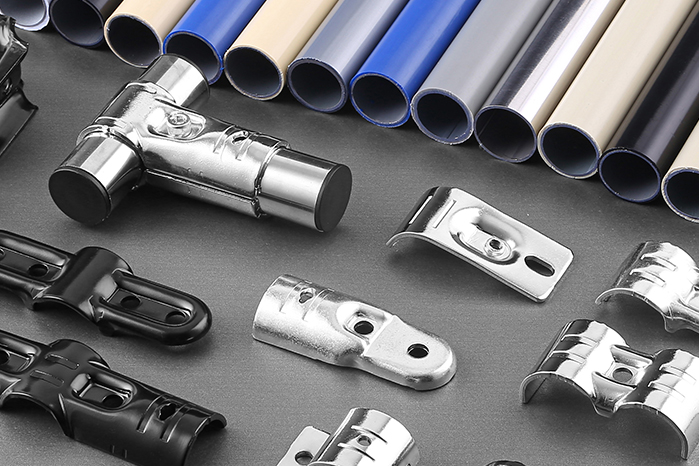
A well-designed rack built poorly performs worse than a simpler rack assembled with precision. Metal tube connectors—the joints that tie your lean system together—demand installation rigor that many manufacturers underestimate. A loose connection appears minor until vibration, load cycling, or thermal stress transforms that minor gap into a catastrophic failure.
Why Installation Technique Matters as Much as Component Quality
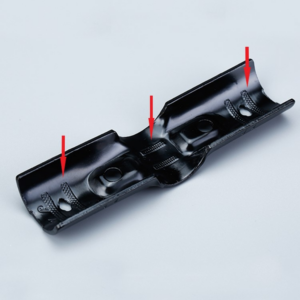
Quality metal tube connectors can only perform when installed correctly. The best connector design still fails if the fastening process introduces gaps, misalignment, or inadequate clamping force.
Understanding the mechanics reveals why. A bolted joint transmits load through clamping force created by bolt preload. If the bolt isn’t tightened adequately, the joint experiences microslip—tiny movements between the mating surfaces. Microslip creates fretting corrosion, loosens the fastener further, and eventually allows the joint to fail under load.
Additionally, assembly sequence matters. Tightening fasteners in random order concentrates load unevenly, creating gaps on one side of the joint while over-stressing the opposite side. A systematic sequence distributes clamping force evenly, ensuring the connector performs as designed.
Pre-Assembly Inspection: Confirming Components Are Ready
Assembly quality is determined before you turn the first bolt. Defective components assembled carefully still result in defective racks.
Inspect metal tube connectors for obvious defects: cracks, bent mounting tabs, stripped threads, or corrosion in threaded holes. Cracks indicate manufacturing defects or damage during shipping. Bent tabs mean the connector was dropped or crushed—its alignment is compromised. Stripped threads mean the fastener won’t develop full preload.
Inspect aluminum or steel tubes for straightness. Place each tube on a flat surface and sight along its length. Bent tubes force joints into misalignment, creating uneven load distribution and loose connections. Severely bent tubes should be rejected; minor bends (less than 1/8 inch over a 10-foot span) may be acceptable depending on load requirements, but document them.
Confirm all fasteners are present and correct type. Count bolts, washers, and nuts against the assembly documentation. Verify bolt grade—if your design specifies Grade 8 bolts, substituting standard bolts reduces clamping force capacity. Mixed fastener grades cause problems: weaker fasteners fail while stronger ones over-stress the connector.
Inspect bolt threads for damage. Roll bolts across a flat surface; they should roll smoothly without catching. Stripped or damaged threads won’t develop proper preload. Discard damaged fasteners rather than forcing them into service.
Lay out all components for each rack assembly in organized sequence. This “kit staging” prevents confusion during assembly and ensures nothing is forgotten. At Junyi, our metal pipe joints often come with assembly guides specifying component lists—use these guides as your staging checklist.
Fastening Sequence: The Order Determines Connection Integrity
Fastening order isn’t arbitrary. The sequence distributes preload evenly across the connector, ensuring all surfaces seat properly.
For a connector with four bolts arranged in a rectangle, use a “cross” or “X” pattern: tighten the top bolt, then the bottom bolt, then the left, then the right. This alternating pattern prevents the connector from rocking or tilting as you tighten.
Don’t tighten all bolts fully in the first pass. Use a two-pass approach: first pass tightens bolts to approximately 50% of target preload in the proper sequence, second pass tightens to full preload using the same sequence. Two-pass tightening ensures that clamping force builds evenly rather than concentrating in one area.
Torque and Tightness: Finding the Balance Point
Achieving proper preload requires either torque specification or tension measurement. Most lean manufacturing applications use torque as the practical control method.
Torque specification depends on fastener size, material grade, and coating. A 1/4-inch Grade 5 steel bolt torqued to 8 foot-pounds develops different preload than a 1/4-inch Grade 8 bolt torqued to the same value. Coating matters too—zinc plating slightly increases friction, changing the torque-preload relationship.
Consult the fastener manufacturer’s technical documentation or industry standards (such as ASME B4.1 or equivalent) for torque specifications matching your exact fastener size, grade, and condition.
Avoid the temptation to tighten “a little more” on joints that feel slightly loose. Over-tightening creeps toward fastener failure. Instead, loosen the bolt slightly and retighten following the proper sequence. This resets the joint, often eliminating minor looseness.
Detecting Installation Problems Before They Become Failures
Field verification methods confirm that your assembly technique achieved proper preload without requiring specialized equipment.
Visual inspection for gaps: Examine the connection between the connector and the tube. If daylight shows between components at any fastener location, clamping force is inadequate. Gaps indicate that preload hasn’t seated the connector properly against the tube shoulder.
Shake test (for completed assemblies): Grasp the rack and attempt to move it side-to-side and front-to-back. Excessive play indicates loose connections. Minor flexibility is normal in large structures, but obvious movement suggests assembly problems.
These verification methods catch problems before the rack enters service. Fixing issues during assembly is far cheaper than addressing failures after the rack is loaded.
Documenting Your Process So Every Rack Assembles Consistently
Standardized procedure is how you ensure your first rack and your hundredth rack assemble with equal quality.
Create an assembly document for each rack design. Include:
- Component checklist (confirm all parts present before starting)
- Fastener specifications (size, grade, torque value)
- Tightening sequence (with diagram showing bolt numbering)
- Inspection checklist (visual gaps, bolt-rotation test, alignment verification)
- Common mistakes (things that have gone wrong in past assemblies)
Use the documentation during every assembly. Don’t rely on memory or intuition. Our metal pipe joints at Junyi can be paired with custom assembly guides specific to your lean rack designs. Standardized documentation means that any trained technician can build a rack that performs identically to the previous one.
Track assembly problems. If a connection develops issues in the field, document what failed and why. Investigate whether the problem was component quality, assembly technique, or design. Use findings to update your documentation so future assemblies avoid the same mistake.
From Loose Connections to Reliable Infrastructure
Lean manufacturing racks deliver their promised flexibility only when connections remain tight. Installation rigor—proper sequence, appropriate preload, systematic verification—transforms good components into reliable infrastructure.
The technician who understands why fastening sequence matters assembles racks that last. The technician who follows procedure by rote sometimes succeeds, but risks failures when conditions differ from previous experience.
Documenting and standardizing your installation technique ensures that every rack assembled meets the same performance standard.